Overview
Contact Capture turns anonymous phone numbers into real, named contacts. When someone texts one of your numbers for the first time, they receive a welcome message with a link to a simple, branded web form where they can share their name, email, location, and birthday. Once they submit it, that information saves directly to their contact profile in Text Groove, with no follow-up or data entry required on your end.
The form runs automatically, once per person, so every new texter is invited to introduce themselves without you lifting a finger. Instead of a list of ten-digit numbers, you build a database of people you actually know. The means you can greet them by name, send them something relevant to their location, and reach them on their birthday.
Getting Started Video
How to Add Contact Capture
Contact Capture is available to all Text Groove customers.
- Go the the App Directory in your Text Groove Dashboard
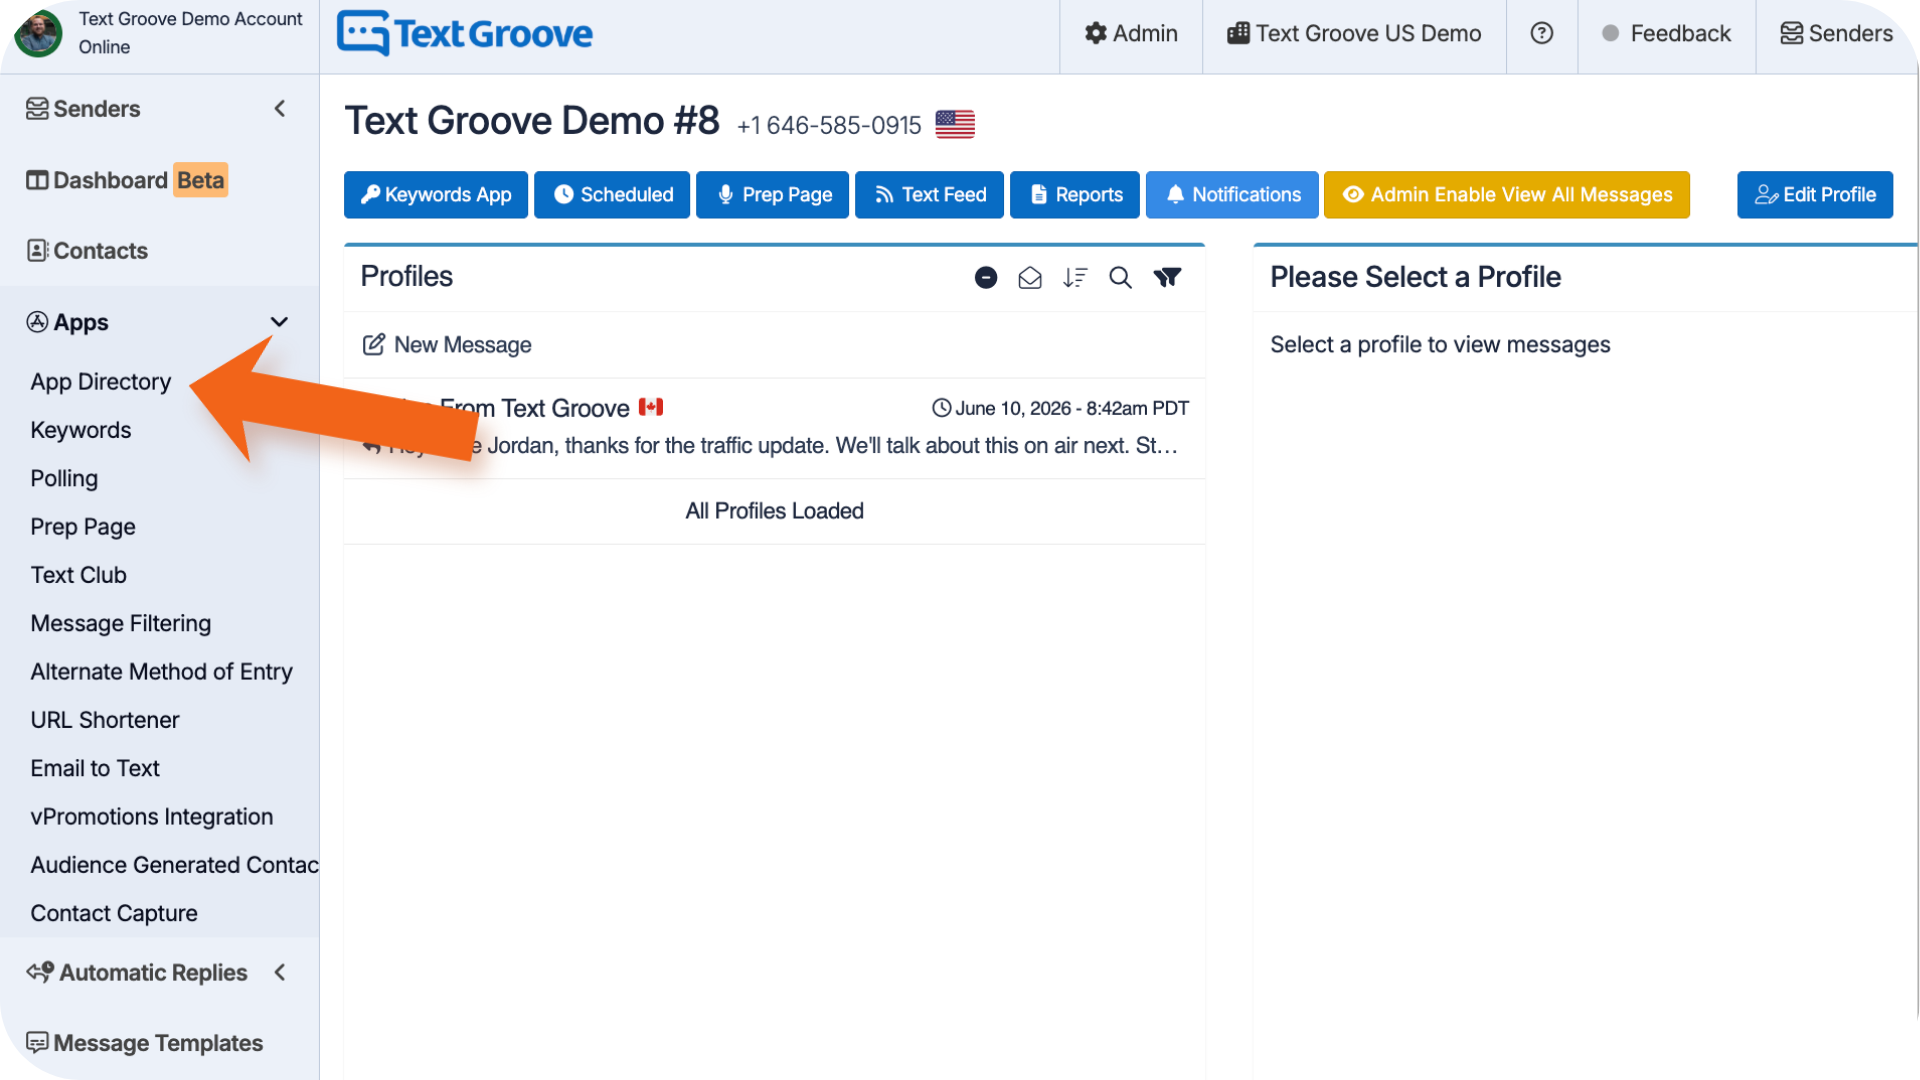
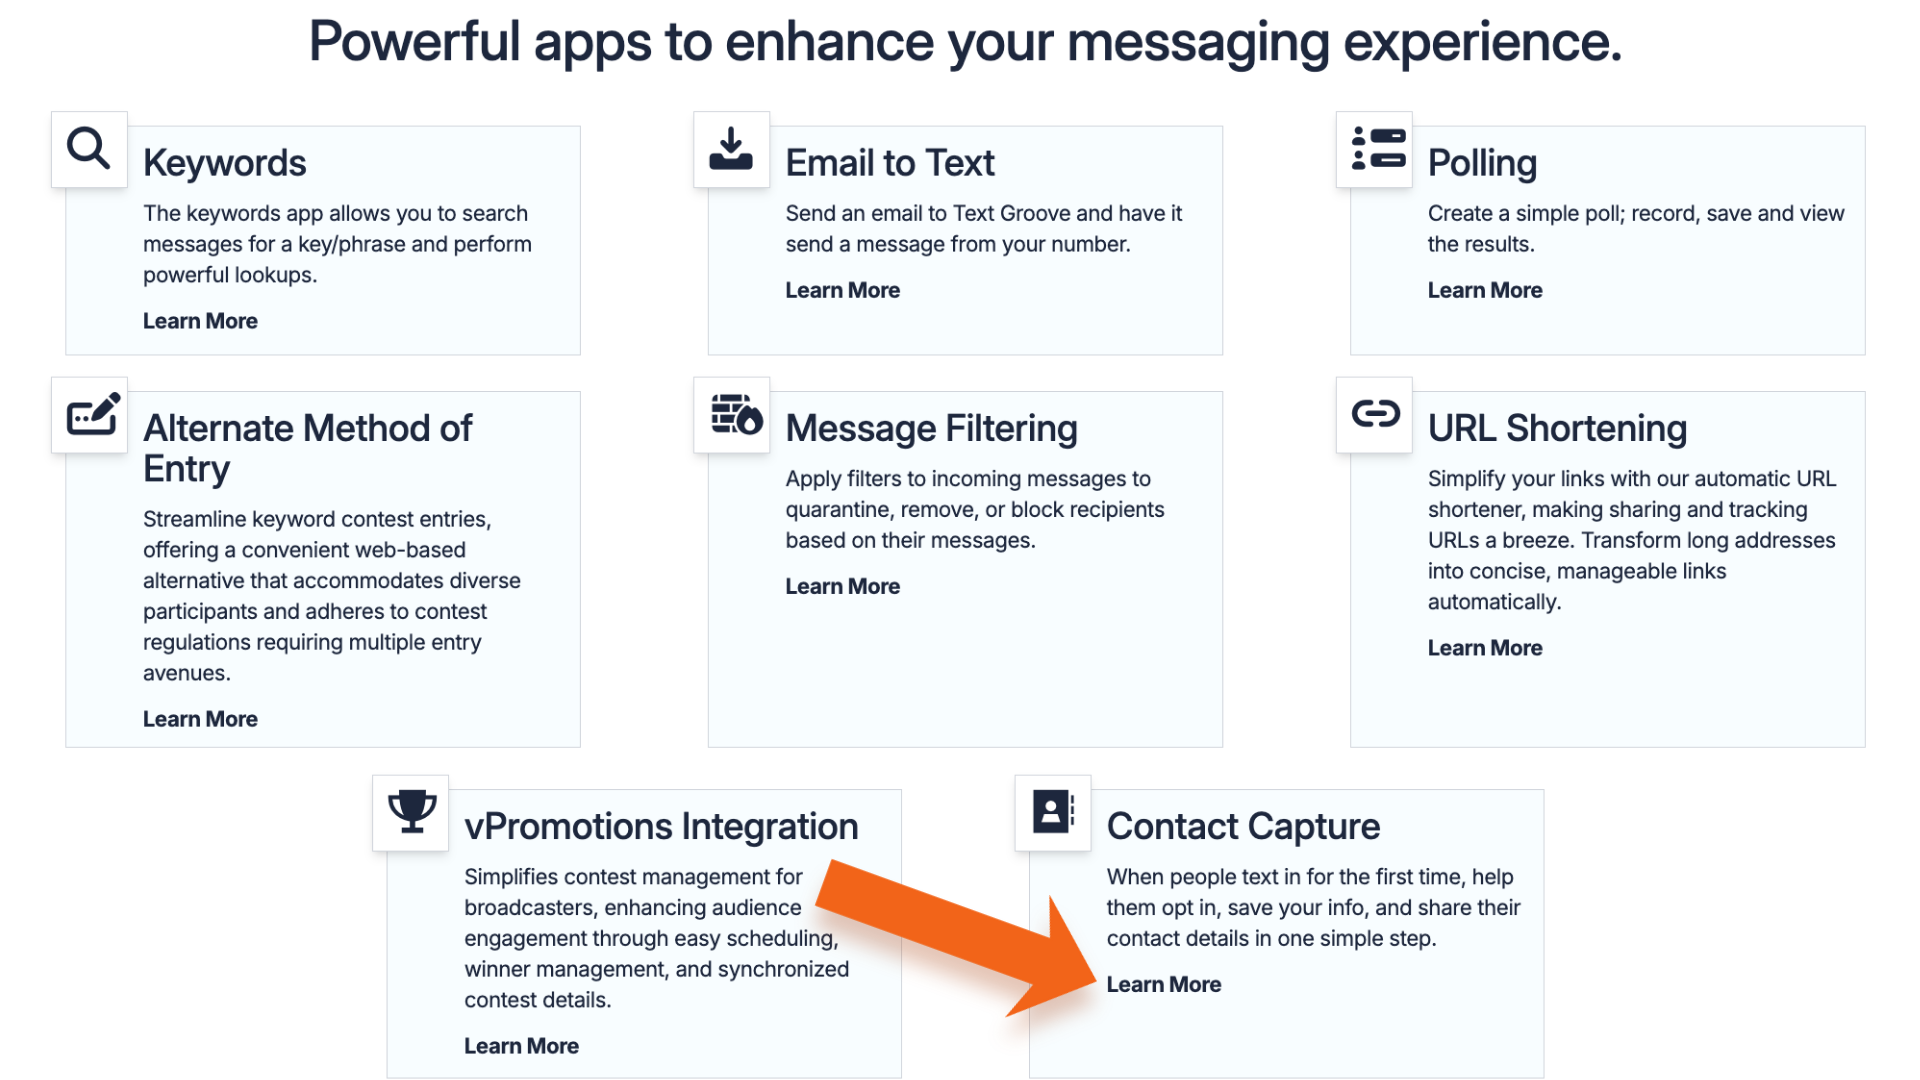
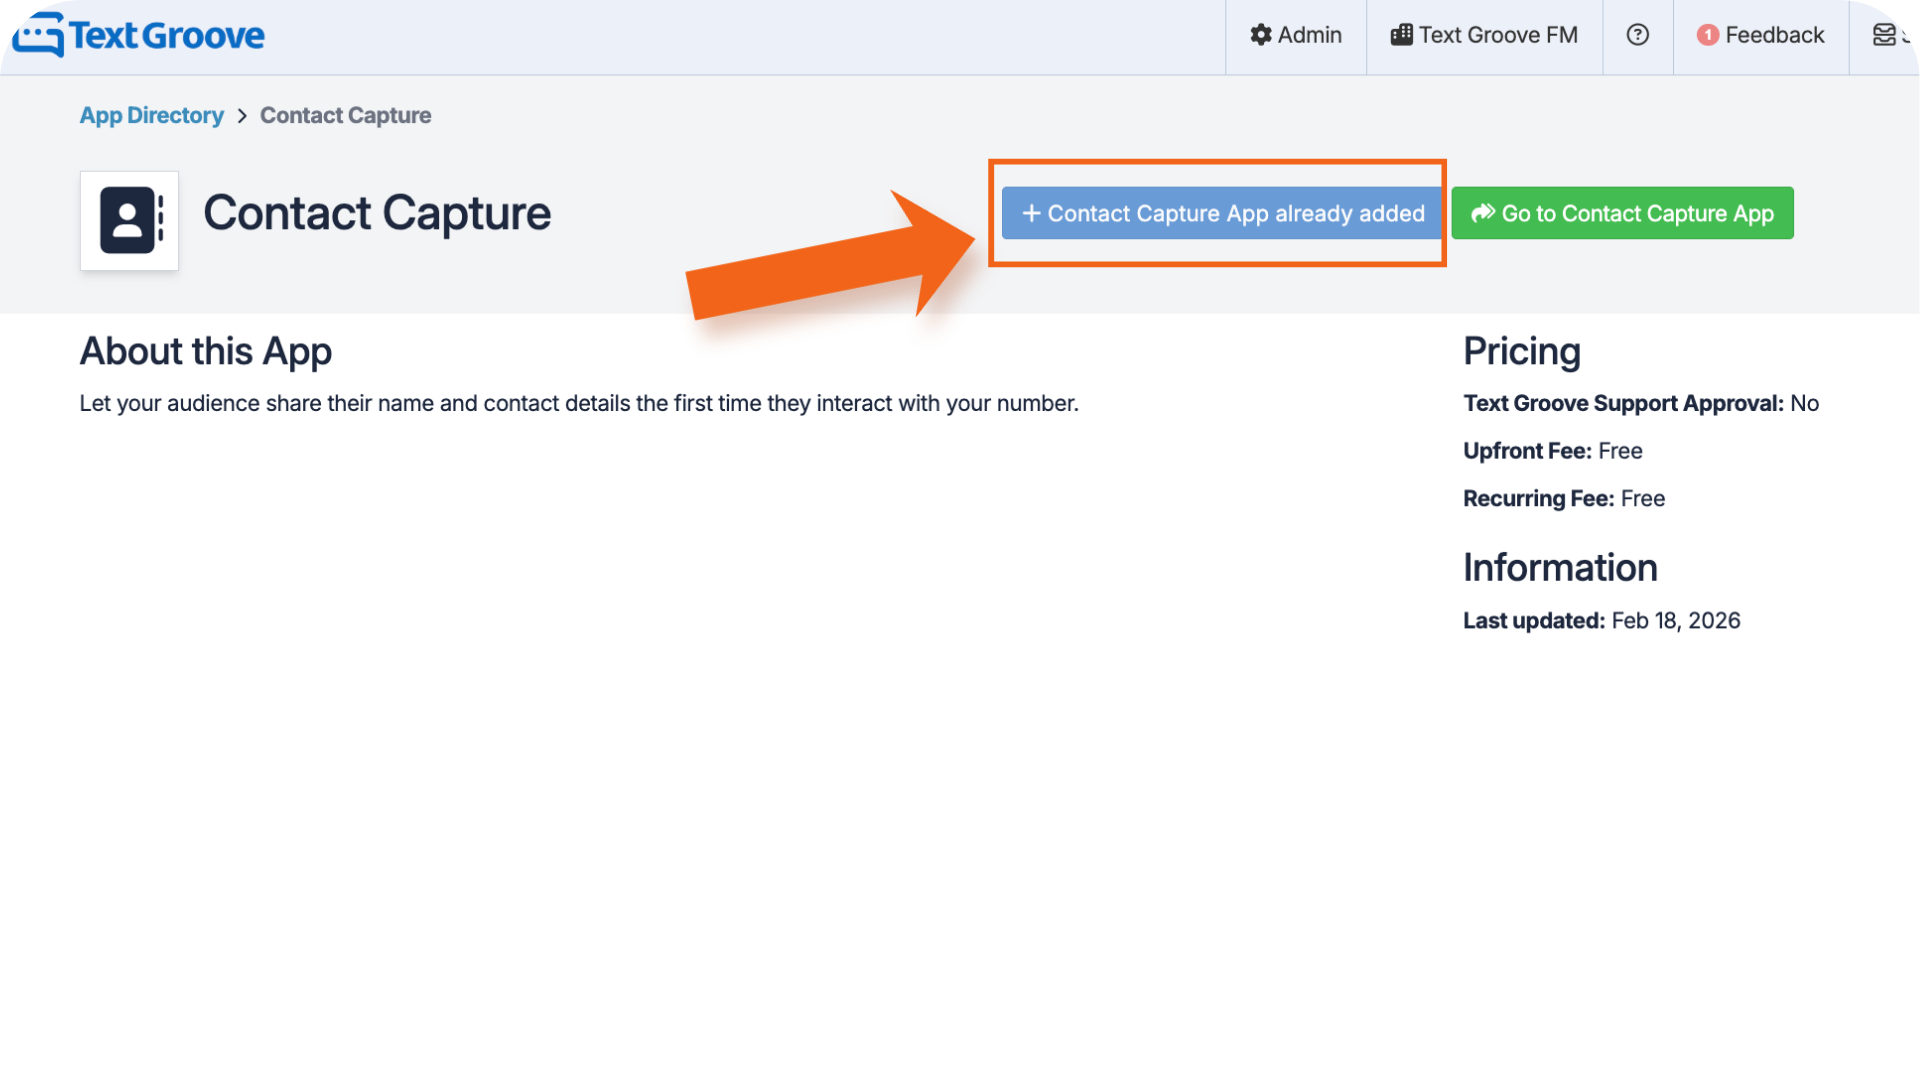
- Add the Contact Capture App by clicking Learn More and then Install App (if the app is already installed the button will be greyed out)
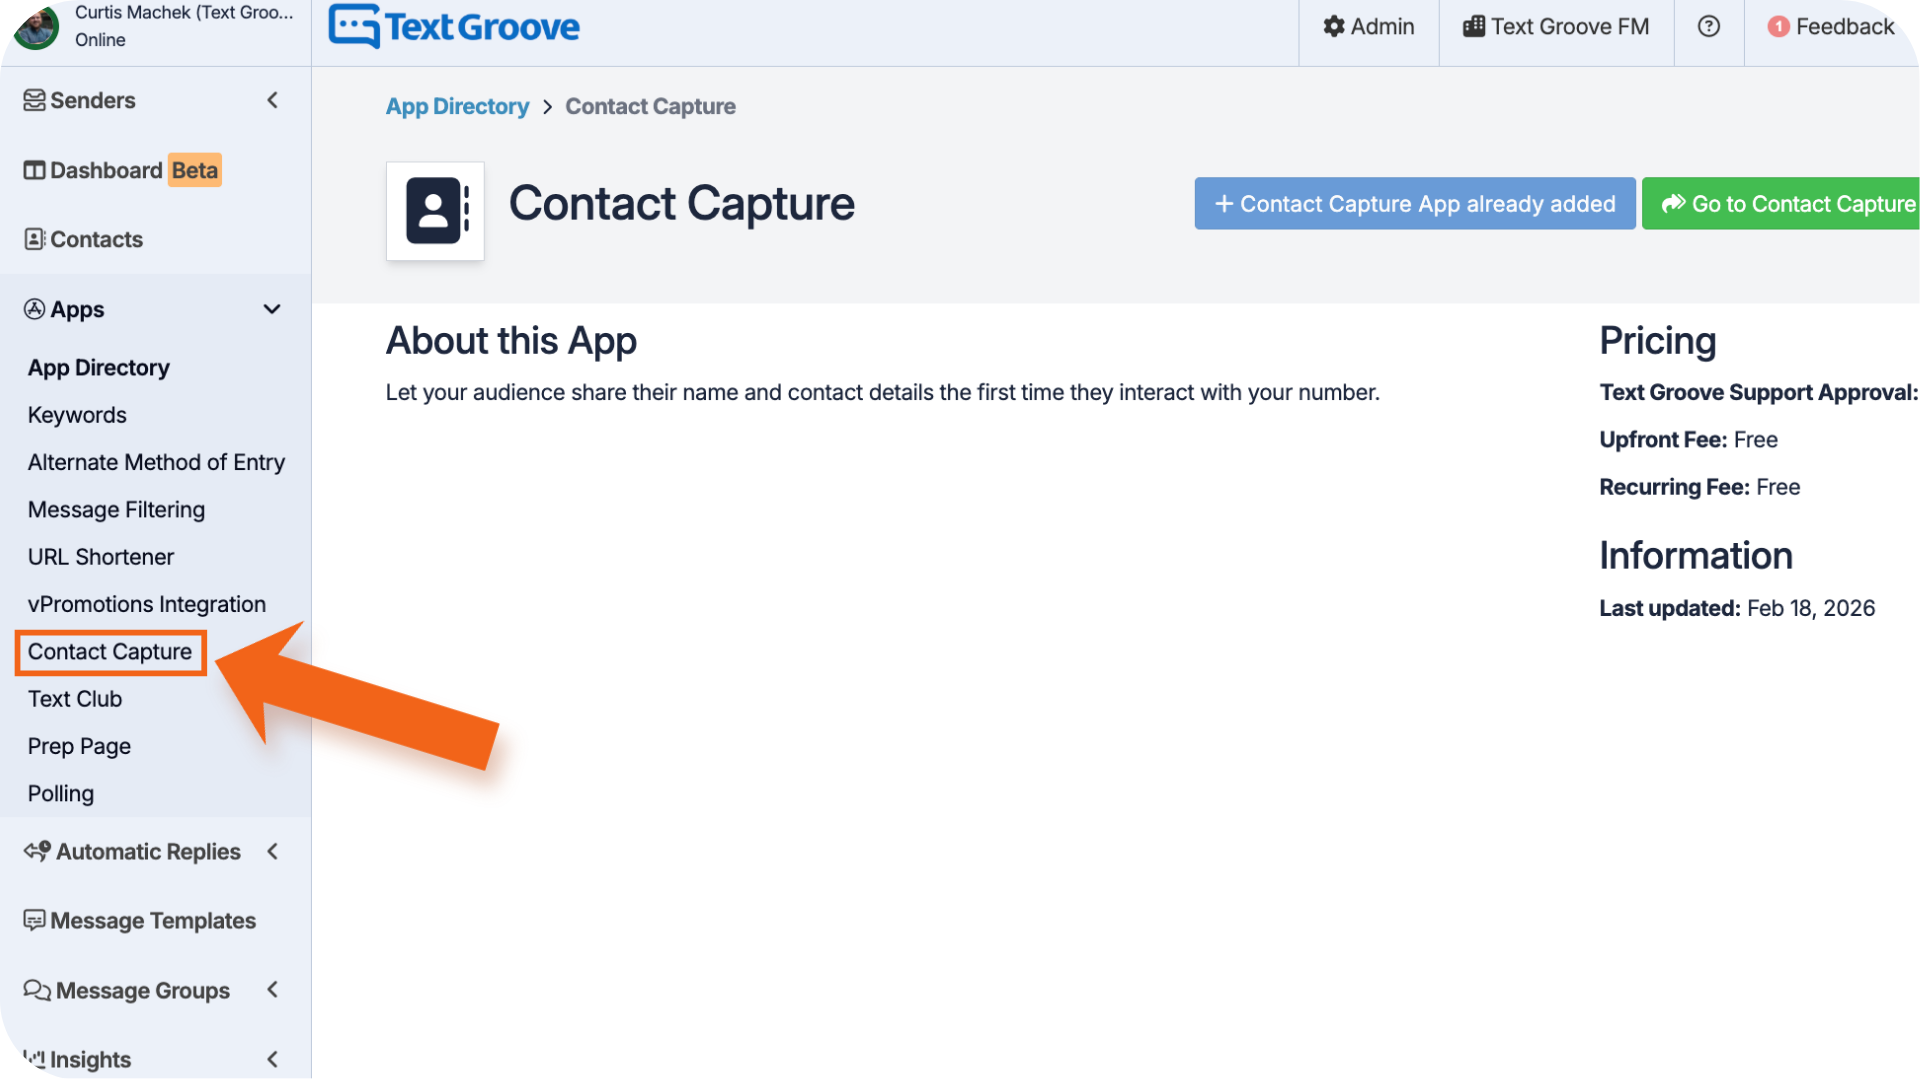
- Once installed, you'll find it in the left-hand menu under Apps, click the Contact Capture to open it.
How to Setup Contact Capture
Set up your Contact Card (vCard) - At the top of the Contact Flow tab is the Contact Card (vCard) section. This is the branded contact card texters can save to their phone, so your name shows up whenever you message them. Fill out each field:
Public Display Name - The name that appears on the saved contact card. This field is required.
Logo / Image - Upload a square logo (JPG or PNG, 250x250 px recommended). This field is required.
Phone Number - This is filled in for you with the number you are editing and cannot be changed here.
Email - The contact email you want saved to the card.
Website URL - The website you want saved to the card.
Include Contact Card (vCard) with Contact Capture - Check this box to make the contact card available to texters so they can save your details to their phone.
Turn on Contact Capture - Toggle Enable Contact Capture on. When it is on, first-time texters are automatically walked through opting in, saving your info, and providing their details in one simple step.
Write your Welcome Message. This message is sent automatically the first time a listener texts in. The system appends the Contact Capture link to the end of it for you, so you do not need to add a link yourself.
Example (Welcome Message): “Thanks for texting the West 99.9 Text Line powered by Assured Travel! Tell us a little about yourself by clicking the link!”
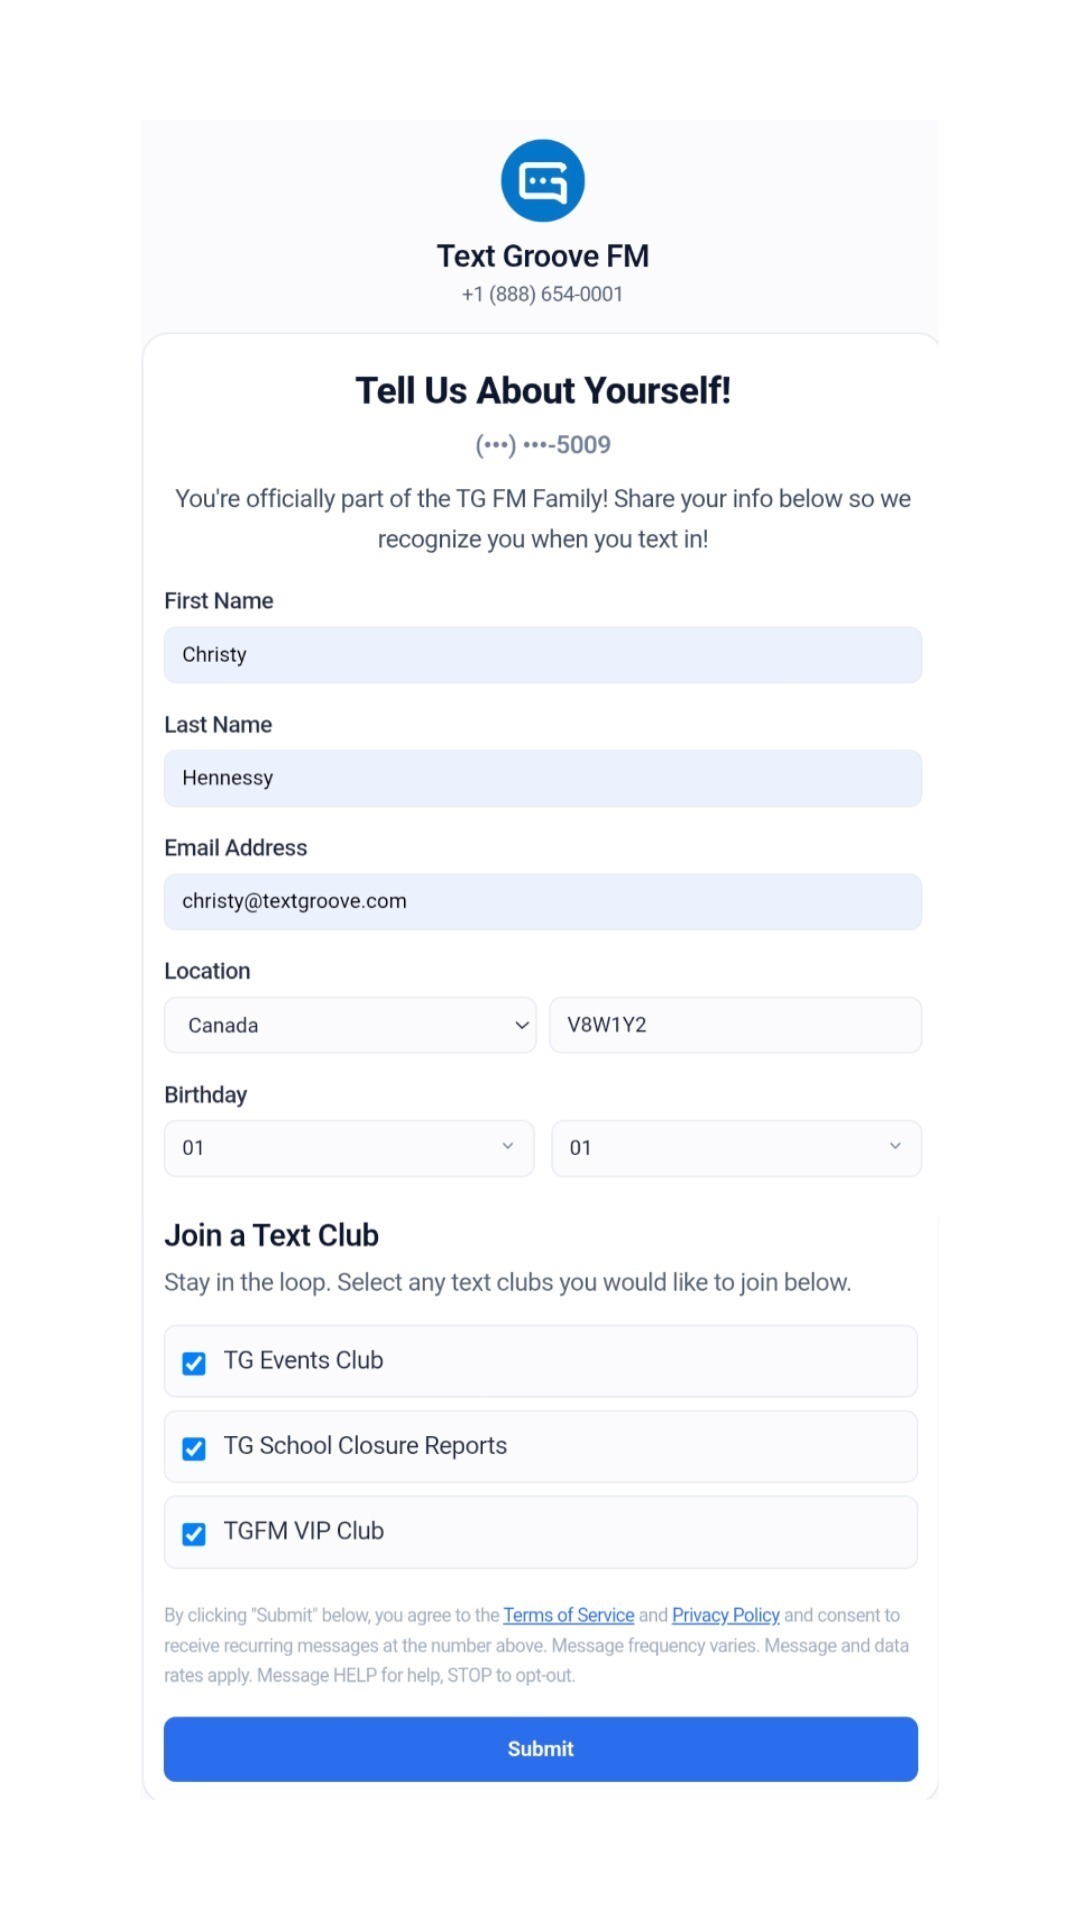
Customize your Contact Form - This is the branded web form texters see after tapping the link. Under the Contact Form section, set the following:
Headline - The title at the top of the form.
Body - A short line explaining why you are asking for their details.
Terms of Service URL - If your station has its own Terms of Service page, add the link here. If you leave this blank, we'll use Text Groove's default link.
Privacy Policy URL - Same as above. Add your station's link, or we'll fall back to Text Groove's default.
Text Club Opt-ins - Check the boxes for any Text Clubs you want to include on the form. This lets texters opt into those clubs in one step while filling out their contact details, instead of texting a separate opt-in keyword for each club.
Customize your Confirmation page - This is what texters see after they submit the form. Under the Confirmation section, set the following:
Headline - The title at the top of the form.
Body - If you enabled the contact card in Step 2, this is where texters are prompted to save it to their phone, otherwise a short line confirming their opt-in. You can use the body to encourage them to click and download / save the contact to their phone.
Save your settings - Click Save Contact Flow and you are live. From that point forward, every new texter on that number receives the form automatically, once per person, with no duplicates.
How to Use It
Once Contact Capture is live, it runs on its own. Here is what happens and how you put the results to work.
A new listener texts in - The first time someone texts your number, they automatically receive your welcome message with the Contact Capture link at the end. Existing texters are not sent the form again.
They fill out the form - The listener taps the link, lands on your branded form, and shares their details. If you include Text Clubs, they can opt into them right there. When they submit, they see your confirmation page and can save your contact card to their phone.
The details are saved automatically - Everything the listener submits saves directly to their contact profile in Text Groove. There is no import, no data entry, and no follow-up needed on your end.
You use the captured details - Captured contacts appear under Contacts in the left-hand menu, where you can view and manage each profile. From there you can personalize your messaging, target by location, celebrate birthdays, and build the audience segments that make your text blasts land.
Notes:
- No auto-duplicate sends: Contact Capture is only sent once per opt-in session. If a listener has already received the link, we won't send it again, even if they text in multiple times after that.
- Existing contacts: If someone was already texting your station before you turned Contact Capture on, they'll still get the link the next time they text in. Any information they fill through the form will replace what is stored, so your info remains accurate.
- Partial info is fine: If a listener's profile already has some information saved in the platform, they can still overwrite or add to it through the form.
- Station Contact Card: Check Include Contact Card (vCard) with Contact Capture before going live. It lets new texters save your station to their phone on the spot, so your name shows up every time you message them.
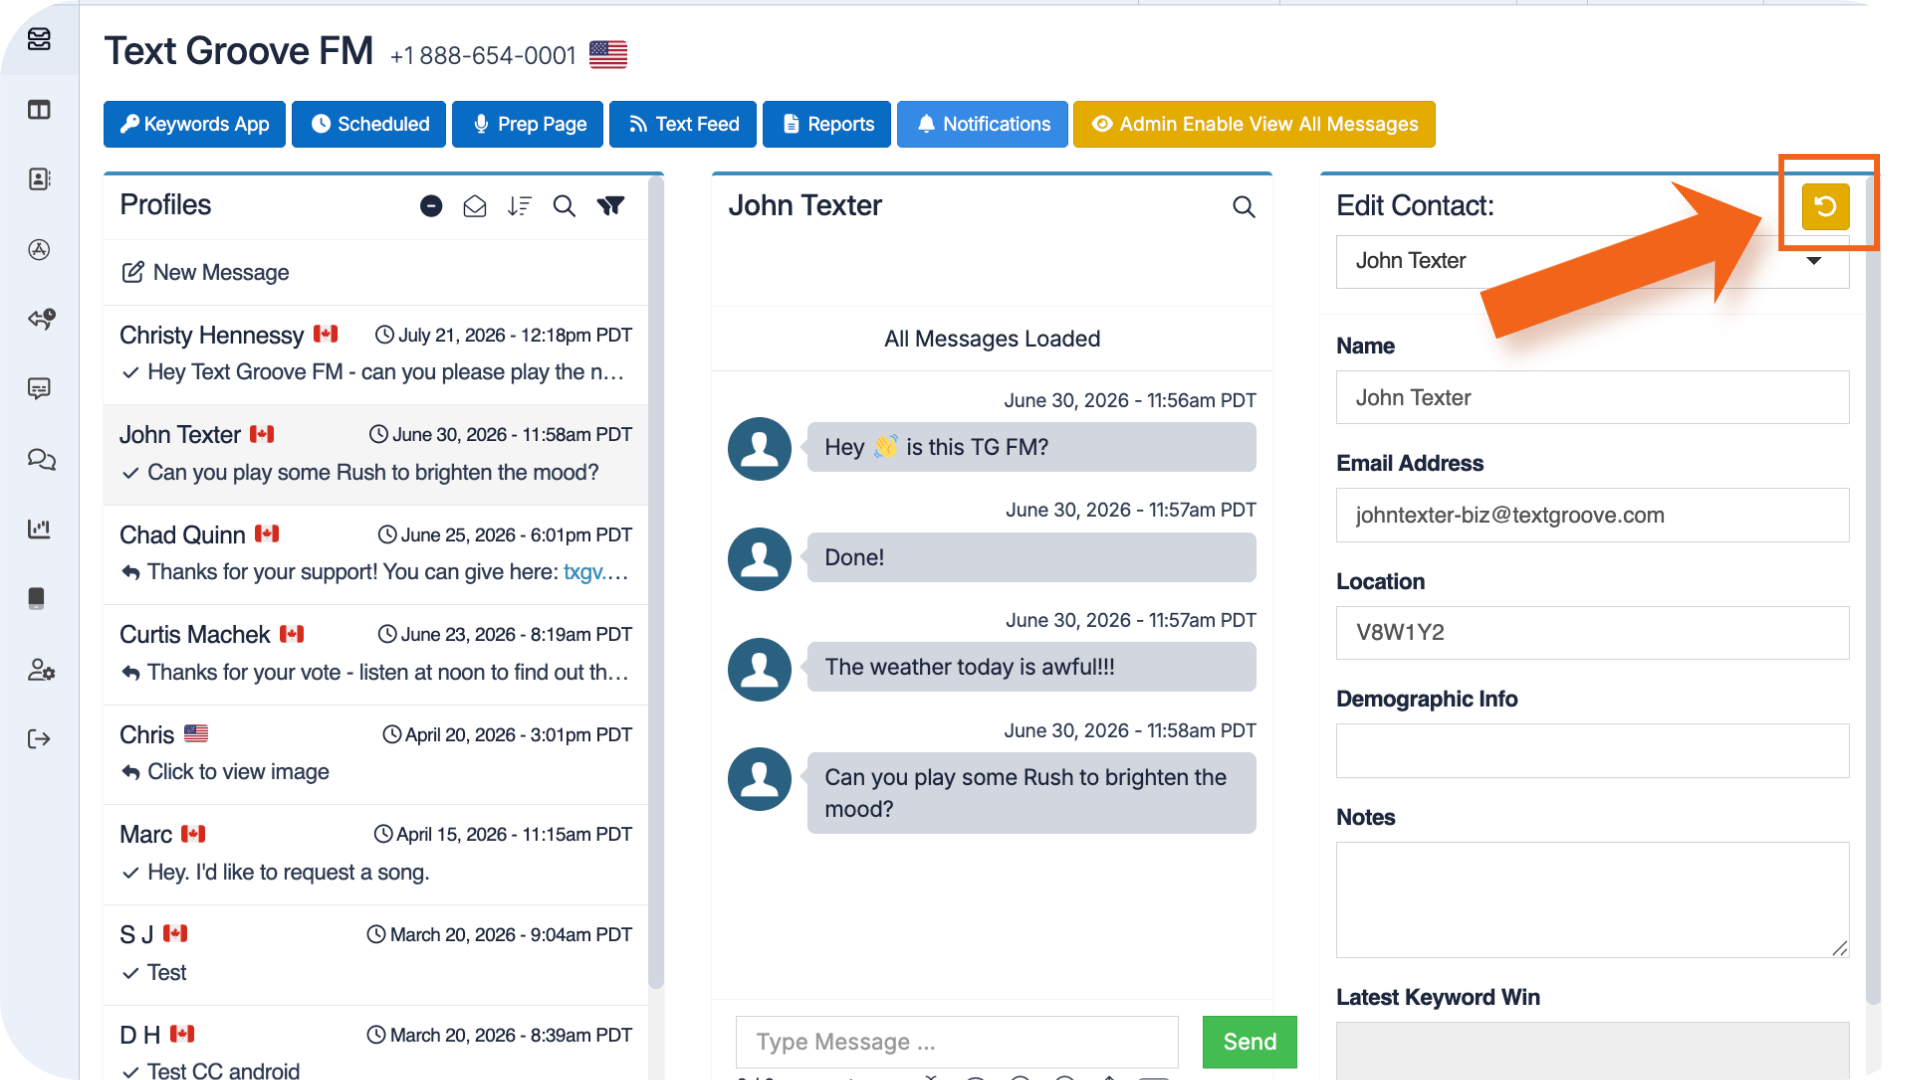
- Contact Capture Resend: A listener requests you resend them the Contact Capture – it happens, we all lose track of texts. Click the yellow Reset Contact Capture icon in their contact profile in the main sending window. This will manually resend the Contact Capture text to them.
Was this article helpful?
That’s Great!
Thank you for your feedback
Sorry! We couldn't be helpful
Thank you for your feedback
Feedback sent
We appreciate your effort and will try to fix the article